
Edit State/System Landing Pages: Color Selection
States/systems can create a customized, branded Transferology® landing page to help promote colleges and universities to prospective students. When navigating to Transferology through the system's referral link or badge, students will see the customized page (assuming it is published) instead of the CollegeSource-branded homepage.
Before making changes to the landing page, please see Edit State/System Landing Pages: An Overview Guide (Related Articles). State Coordinators will need to determine whether to make changes to the landing page in its published or unpublished state. This article assumes that, if needed, the landing page has already been unpublished and will be republished afterward once changes are complete.
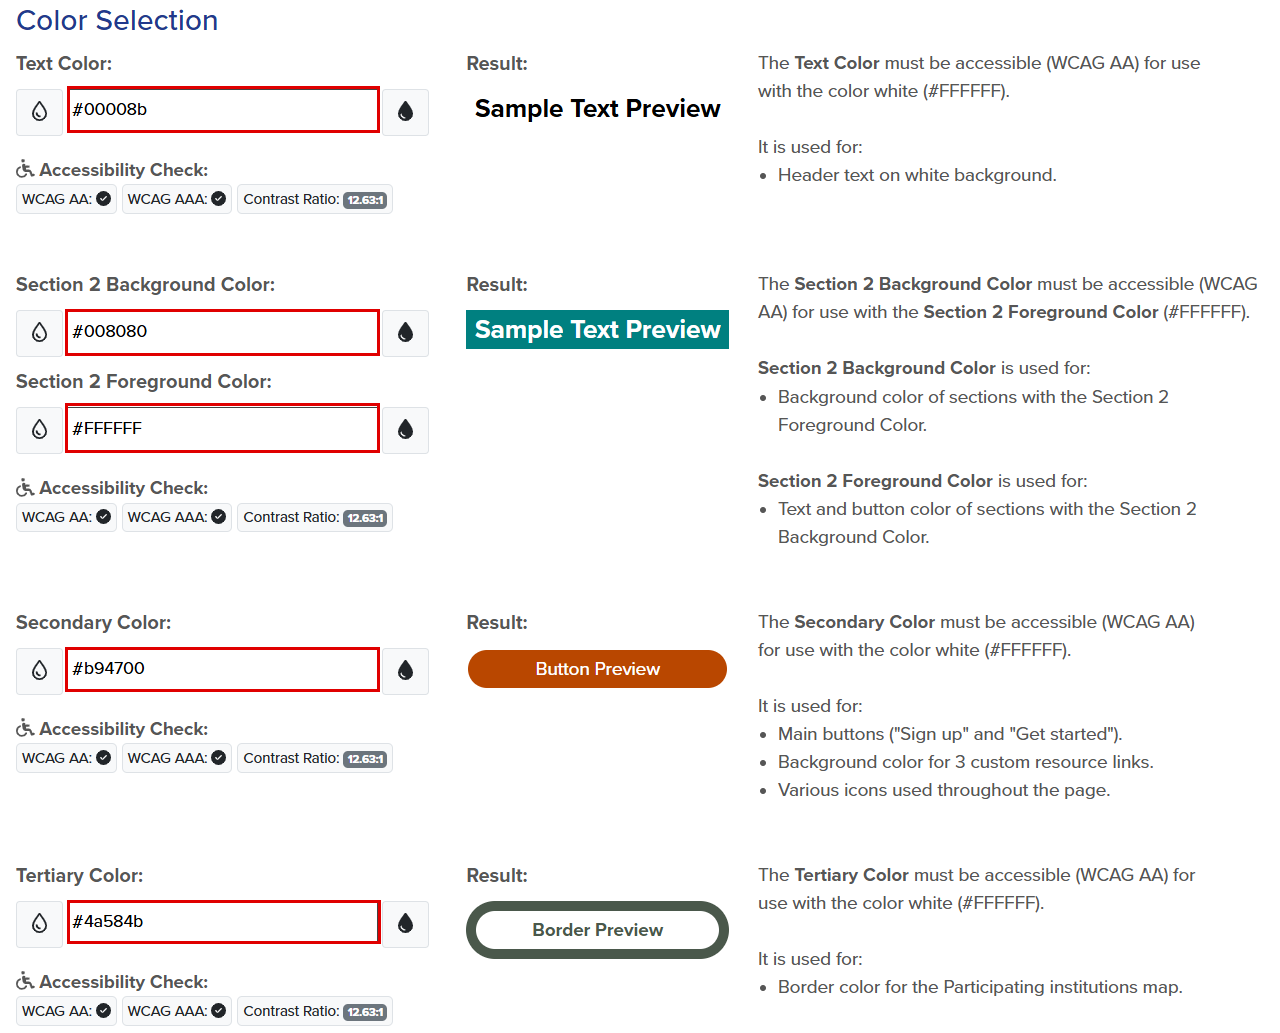
The hex numbers of school colors can be used to customize select header text, background color, foreground color, buttons, icons, and borders within the landing page.
Create State/System Landing Pages: Color Selection (under Related Articles) provides further details about the aspects of the landing page that the color selections control.State/system representatives can contact the appropriate Marketing department(s) to confirm hex code numbers.
Visit a sample Transferology® system landing page for a detailed look at how color selections appear on a state/system landing page. See Related Articles.
- Text Color: #00008b (dark blue).
- Section 2 Background Color: #008080 (teal).
- Section 2 Foreground Color: #FFFFFF (white).
- Secondary Color: #b94700 (orange).
- Tertiary Color: #4a584b (dark green).
To make changes to the color selections:
- Go to the School Profile menu.
- Select Promote Your School.
- Select the State/System Template tab.
Users can also navigate to Promote Your School via the How to promote your school hyperlink within the Profile Preview.
- Users will be presented with a message asking for affirmation that the content of the landing page is not the responsibility of CollegeSource. Images, color, and text added to this page are the responsibility of the institution, state, or system to which the page belongs.
- Mark the checkbox in front of I agree and select Agree to continue.
- Scroll down to the section labeled Color Selection.
Within the editor, users with the State Coordinator role will see the text, section 2 background and foreground, secondary, and tertiary color hex numbers currently or last used within the landing page.
To adjust a color selection:
- Navigate to the hex code box and use the keyboard to remove the current hex code.
- Type in a new hex code value.
- Hex codes are six characters, contain numbers 0-9, and letters a-f.

- Use the following fields to additionally adjust and verify the display of the color selection after entering the hex code:
| Field | Image | Description |
| lighten |
|
Select this button to lighten the text, button, or border. |
| darken |
|
Select this button to darken the text, button, or border. |
| Results |
|
The sample text will adjust to reflect the hex code entered and any lightening or darkening of the text. The button and border previews will adjust to reflect the hex code entered and any lightening or darkening of its background and borders. |
| Accessibility Check |
|
WCAG AA CollegeSource is committed to ensuring its products are accessible to all users. The company follows WCAG 2.2 Level AA standards when developing all products. The color chosen must be WCAG AA accessible for use with the color white (#FFFFFF). A green checkmark indicates that the color selected meets this guideline. A red information icon indicates the color selected does not meet this standard. WCAG AAA A green checkmark indicates that the color selected meets WCAG AAA guidelines, which are higher than those required by CollegeSource. A red information icon indicates the color selected does not meet this standard. Institutions will not be able to publish landing pages with inaccessible colors. If a user enters a hex code that does not meet WCAG AA guidelines, a message will appear under the hex code indicating that WCAG AA accessibility standards are required. |
|
|
|
|


- Select the Preview Changes button at the top of the template to see how selections appear on the landing page.
- Select Save Changes to save adjustments to the landing page.
- A pop-up will appear noting that the user is about to make changes to the landing page for the system. Doing so will make these changes visible to the public if the landing page has been published. Make sure to review changes via the Preview Changes button.
- Select Yes to proceed with saving changes.
- A confirmation will appear indicating that changes have been saved.