
Pathway Management: Display Transfer Agreements in Transferology
Pathway Management is an area within the Transferology® Lab where schools can manage the display of transfer agreements ("Transfer Pathways") with partner institutions. The School Administrator or Transfer Pathway Administrator role is required to access this page within the Lab. This article provides an overview of Pathway Management. For detailed instructions on how to use Pathway Management, see Related Articles below.
In this article:
Overview
Helpful terminology:
- A transfer agreement (or Transfer Pathway) details how coursework from one institution will be accepted and applied at another institution, usually to a specific major.
- A partner school is an institution with which a college has an established transfer agreement or Pathway.
Institutions often create transfer agreements with other schools to help students transition between them more seamlessly. There are multiple types of transfer agreements, including program-to-program, general education, and two-plus-two agreements. Some agreements exist as informal partnerships between institutions, whereas others are formally approved and signed by both colleges' administrations.
Pathways can be created to help students transfer from or to an institution.
To navigate to Pathway Management:
- Go to School Profile.
- Select Pathway Management.
If an institution has a previously established Pathway with another school, the name(s) of the Partner School will appear (alphabetically) below, alongside the number of Pathways (Total Pathways) to and from the school.

The list of partner schools in the table may be populated in a combination of three ways:
- The Lab user's institution manually added a Pathway with that school.
- The Lab user's institution created a Group Report in TES® containing coursework from the partner school. These Group Reports are automatically imported into the Transferology® Lab on a daily basis.
- The partner school created a Pathway to or from the Lab user's institution.
Add a Partner School
Select Add a Partner School to begin adding a Pathway for a new partner school. For further instructions, see Pathway Management: Add a Transfer Pathway under Related Articles.
View and Add Pathways
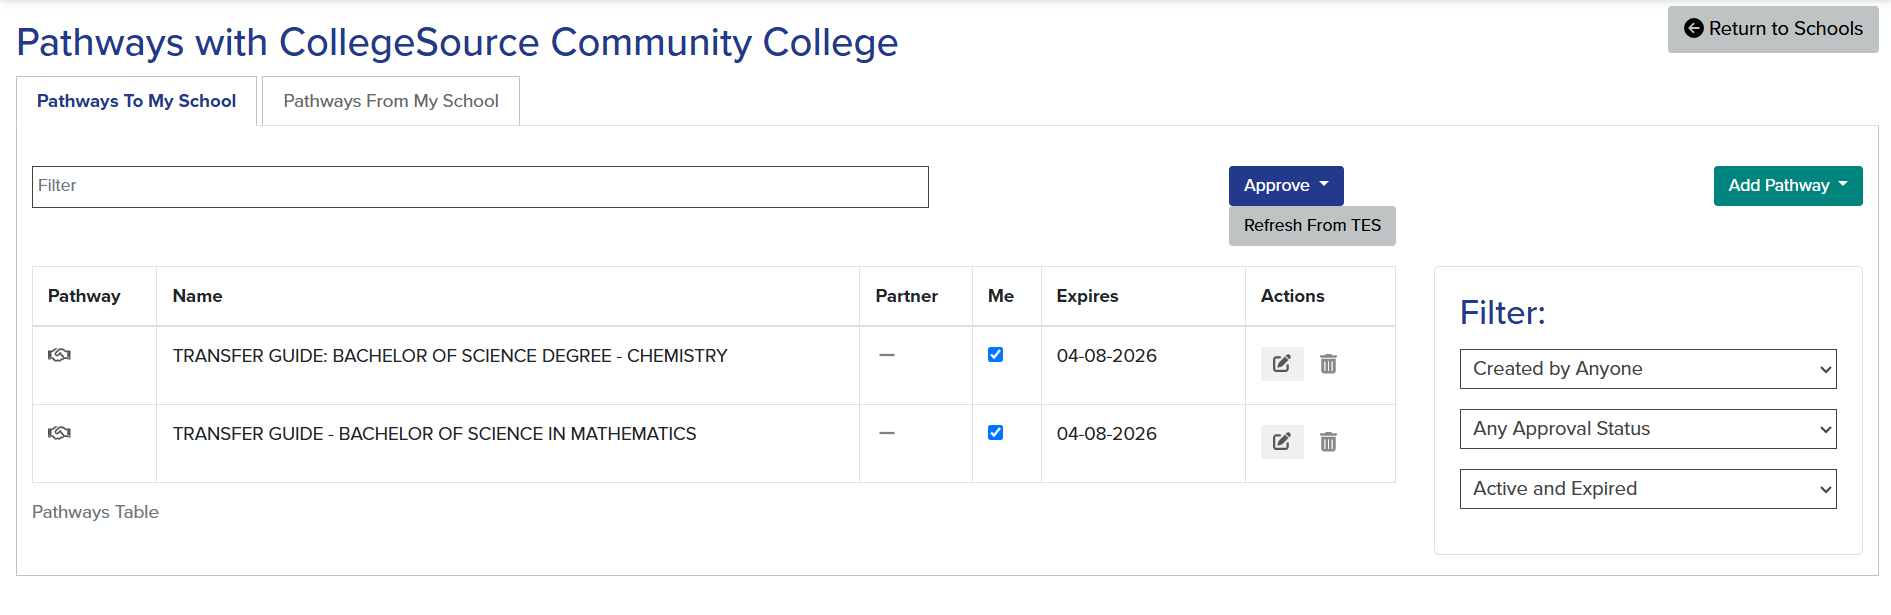
Selecting a numbered hyperlink will take the user to the existing Pathways to and from the Partner School. These are presented within two tabs:
- Pathways To My School
- Pathways From My School
| Column | Explanation |
| Pathway |
Select the handshake icon to review the details of the Pathway agreement. The file will open in a new browser tab. Pathways can be displayed as a:
|
| Name |
The name of the Pathway. Example: TRANSFER GUIDE: BACHELOR OF SCIENCE DEGREE - CHEMISTRY |
| Partner |
Hover over the button to view whether the Pathway was approved by the partner school. - = the partner school subscribes to Transferology but has not yet approved the Pathway. x = the partner school does not subscribe to Transferology and will not show up in Match results. |
| Me |
The checkbox used to approve a Pathway.
|
| Expires |
|
| Edit Pathway | The Edit Pathway pop-up window provides an area to change the name of the Pathway if the person is the Pathway creator. |
| Delete |
A user can delete the selected Pathway if the person is the Pathway creator. |
|
|
|
Add a Partner School
Select Add a Partner School to begin adding a Pathway for a new partner school. For further instructions, see Pathway Management: Add a Transfer Pathway under Related Articles.
Approve All Pathways
Select the Approve button to approve Pathways in bulk. From the button, select:
- All: approves all Pathways to the school listed in the table.
- None: approves no Pathways to the school listed in the table.
Pathways will not show to students until they are approved. If a user approves and then immediately "unapproves" a Pathway, the expiration date will reset.
Refresh from TES
For those "to" partner schools using TES Group Reports, the Refresh From TES button refreshes the list of Pathways from TES on demand instead of waiting for nightly refreshes.
A green bubble momentarily appears in the upper right corner to indicate that the Pathway has been successfully refreshed. The bubble details the number of Pathways created, updated, and deleted.
Add a Pathway
To add a new Pathway, select the Add Pathway button. For further instructions, see Pathway Management: Add a Transfer Pathway under Related Articles.
Transferology® Lab users at institutions that have at least one approved Transfer Pathway will see the Transfer Pathways notation on the school's Profile when viewing Matches, Misses, and Maybes via Course Bundles, Recruit Students, or Advise Students:

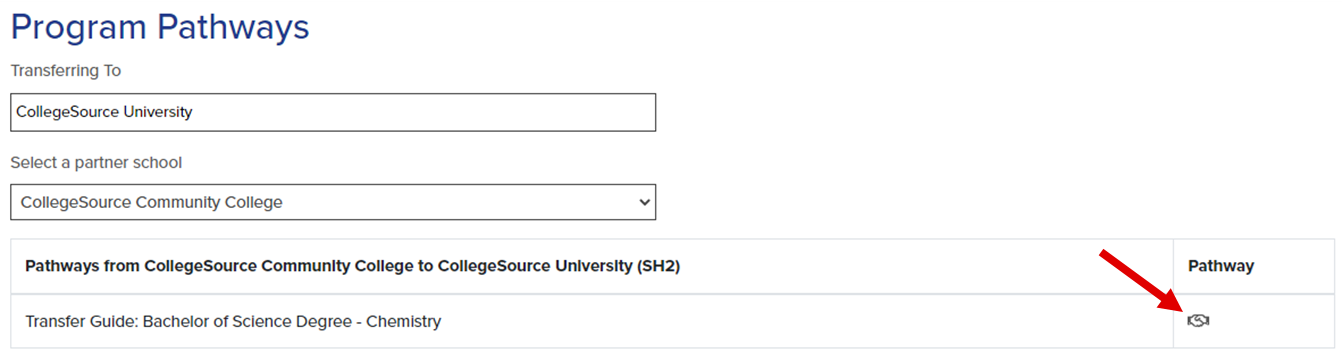
All Transferology Lab users can view approved Pathways via Program Pathways, which is located in the Advising & Recruiting menu. For further information, see Program Pathways under Related Articles.
Notifications
Whenever changes are made in the Pathway Management area, email notifications are generated behind the scenes to the Transfer Pathway Administrator at the school.
Schools will receive email notifications whenever the following actions occur:
- A partnership is created.
- A Pathway is created.
- A Pathway is approaching its expiration date.
- A Pathway name is changed.
- A Pathway is deleted.
The pathway creator ONLY receives an email notification when either of the following conditions are met:
- If the Pathway the creator made is about to expire.
- If the Pathways the creator made do expire.
School Administrators can select how long before Pathway expiration Transfer Pathway Administrators are to be alerted by email via the Expiring Transfer Pathway Notification setting within the General Information tab of the School Profile. See Related Articles for further details.
CollegeSource does not perform any type of validation on Transfer Pathways to ensure content.