
Edit State/System Landing Pages: Add and Remove Participating Institutions and URLs
States/systems can create a customized, branded Transferology® landing page to help promote colleges and universities to prospective students. When navigating to Transferology through the system's referral link or badge, students will see the customized page (assuming it is published) instead of the CollegeSource-branded homepage.
Before making changes to the landing page, please see Edit State/System Landing Pages: An Overview Guide (Related Articles). State Coordinators will need to determine whether to make changes to the landing page in its published or unpublished state. This article assumes that, if needed, the landing page has already been unpublished and will be republished afterward once changes are complete.
In this article:
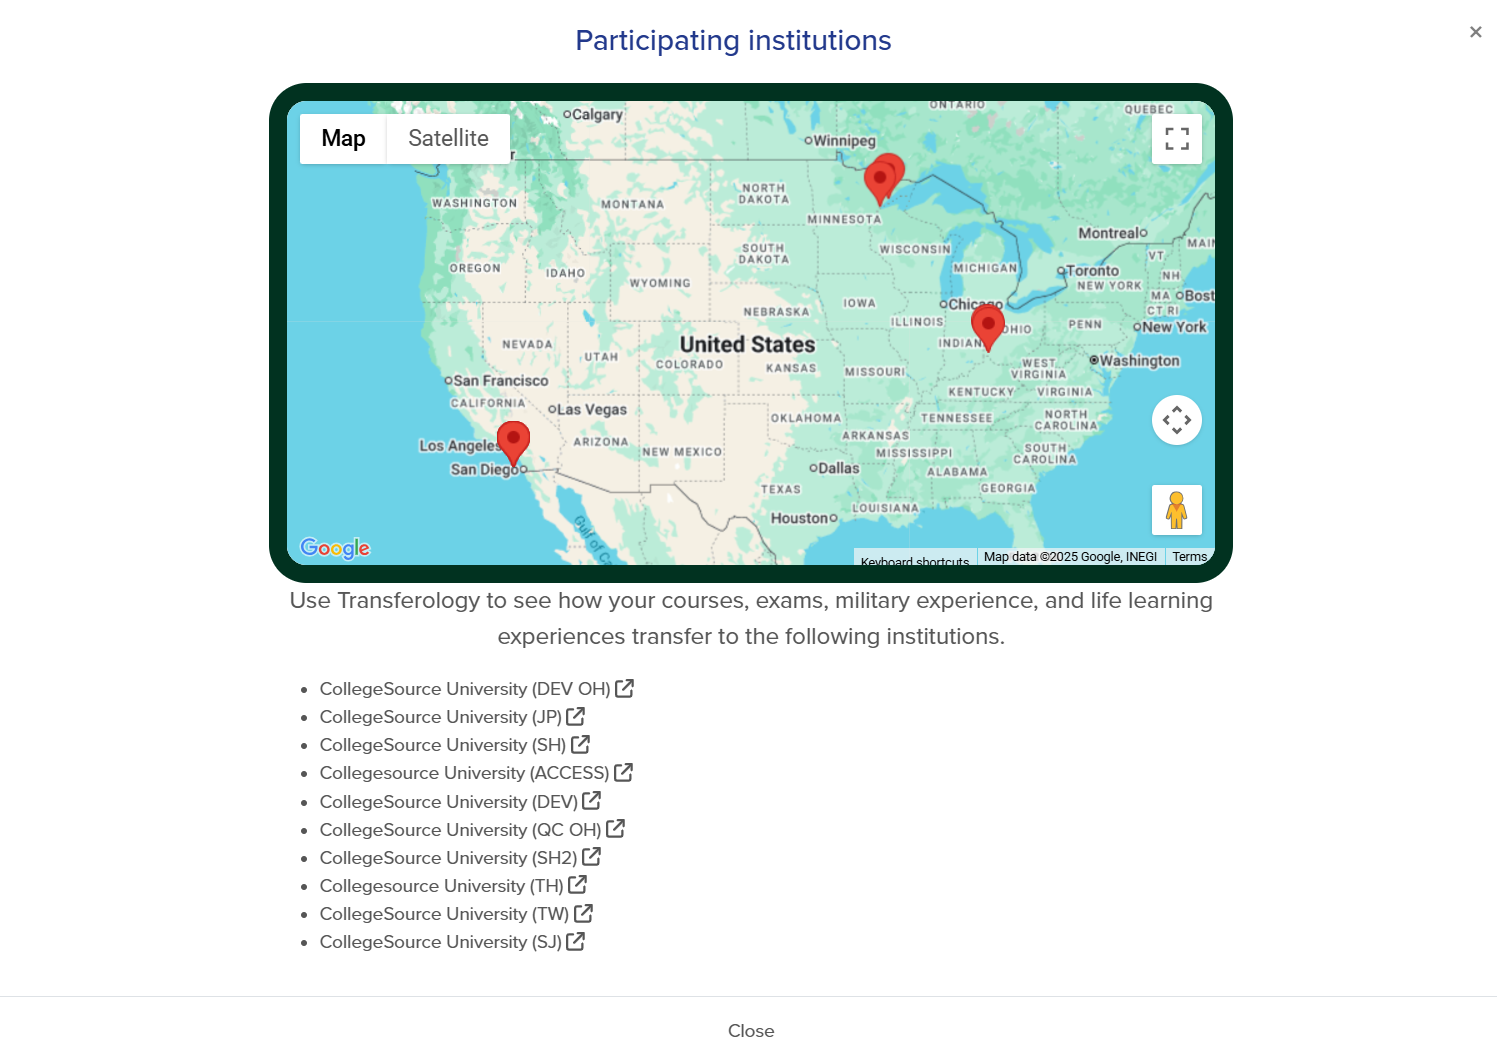
When requesting a state/system landing page, a representative from the state/system supplies CollegeSource with a list of the schools within it. Students can select the View all institutions button from the state/system landing page to view all participating colleges and universities:
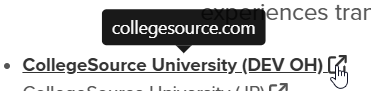
If a URL has been provided for the college or university, students will see a selectable hyperlink when hovering over the institution name:
State Coordinators can edit this list of schools at any time (and add or change optional URLs for each institution) within the State/System Template Editor.
To do so:
- Navigate to the Add and Remove Participating Institutions heading at the top of the editor.
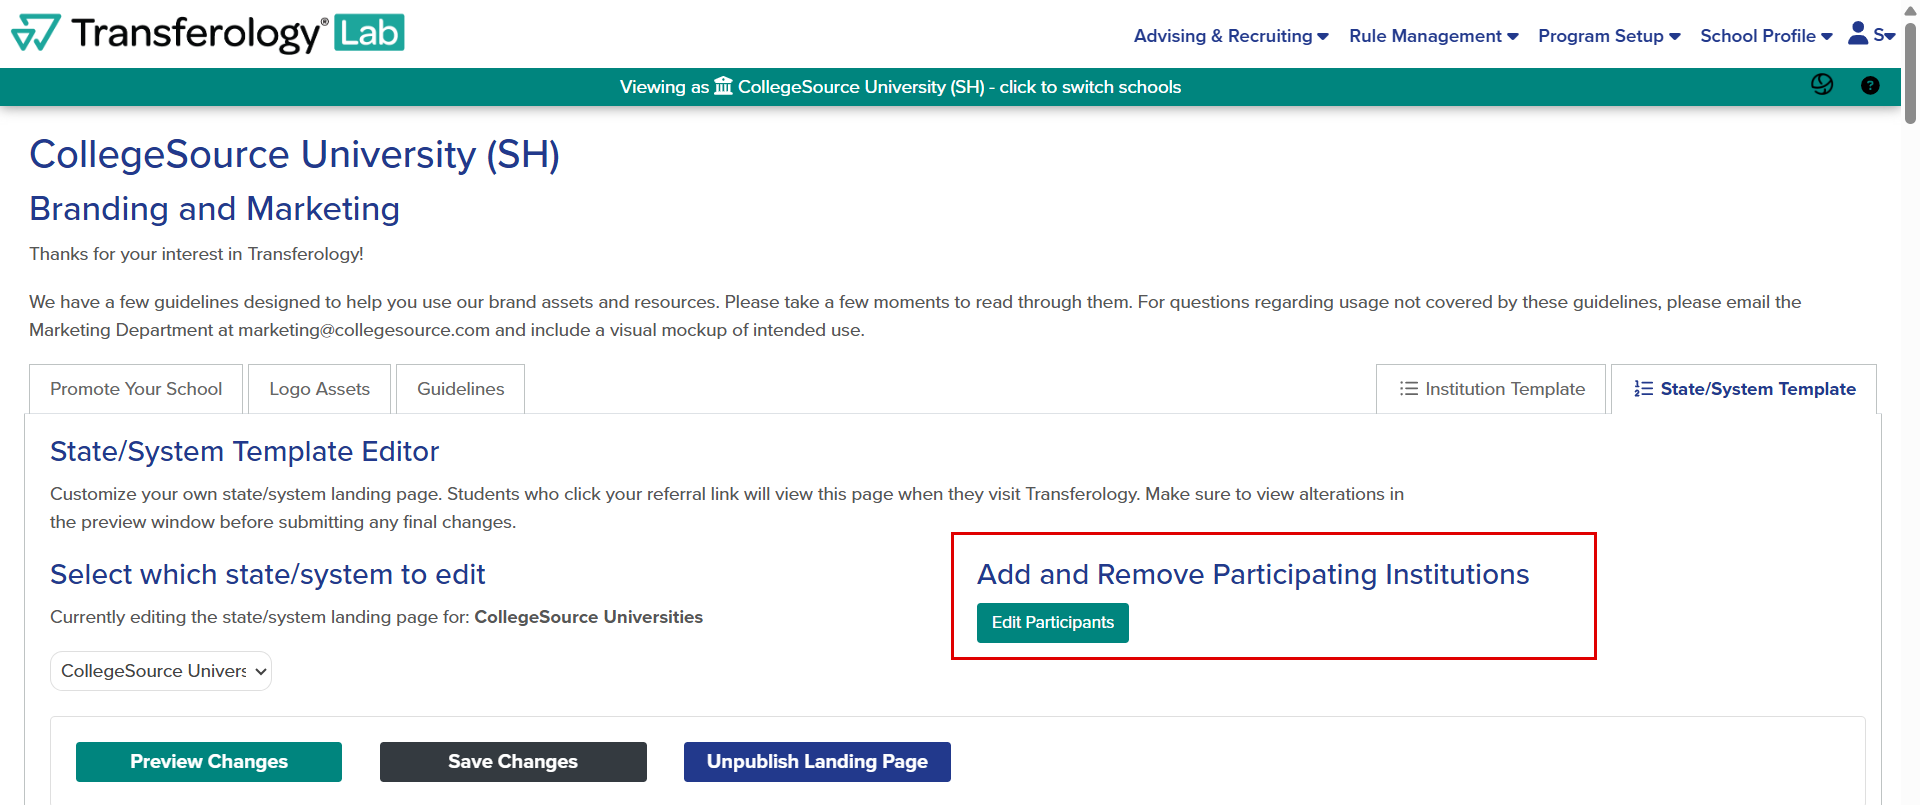
- Select the Edit Participants button.
The following pop-up will appear:
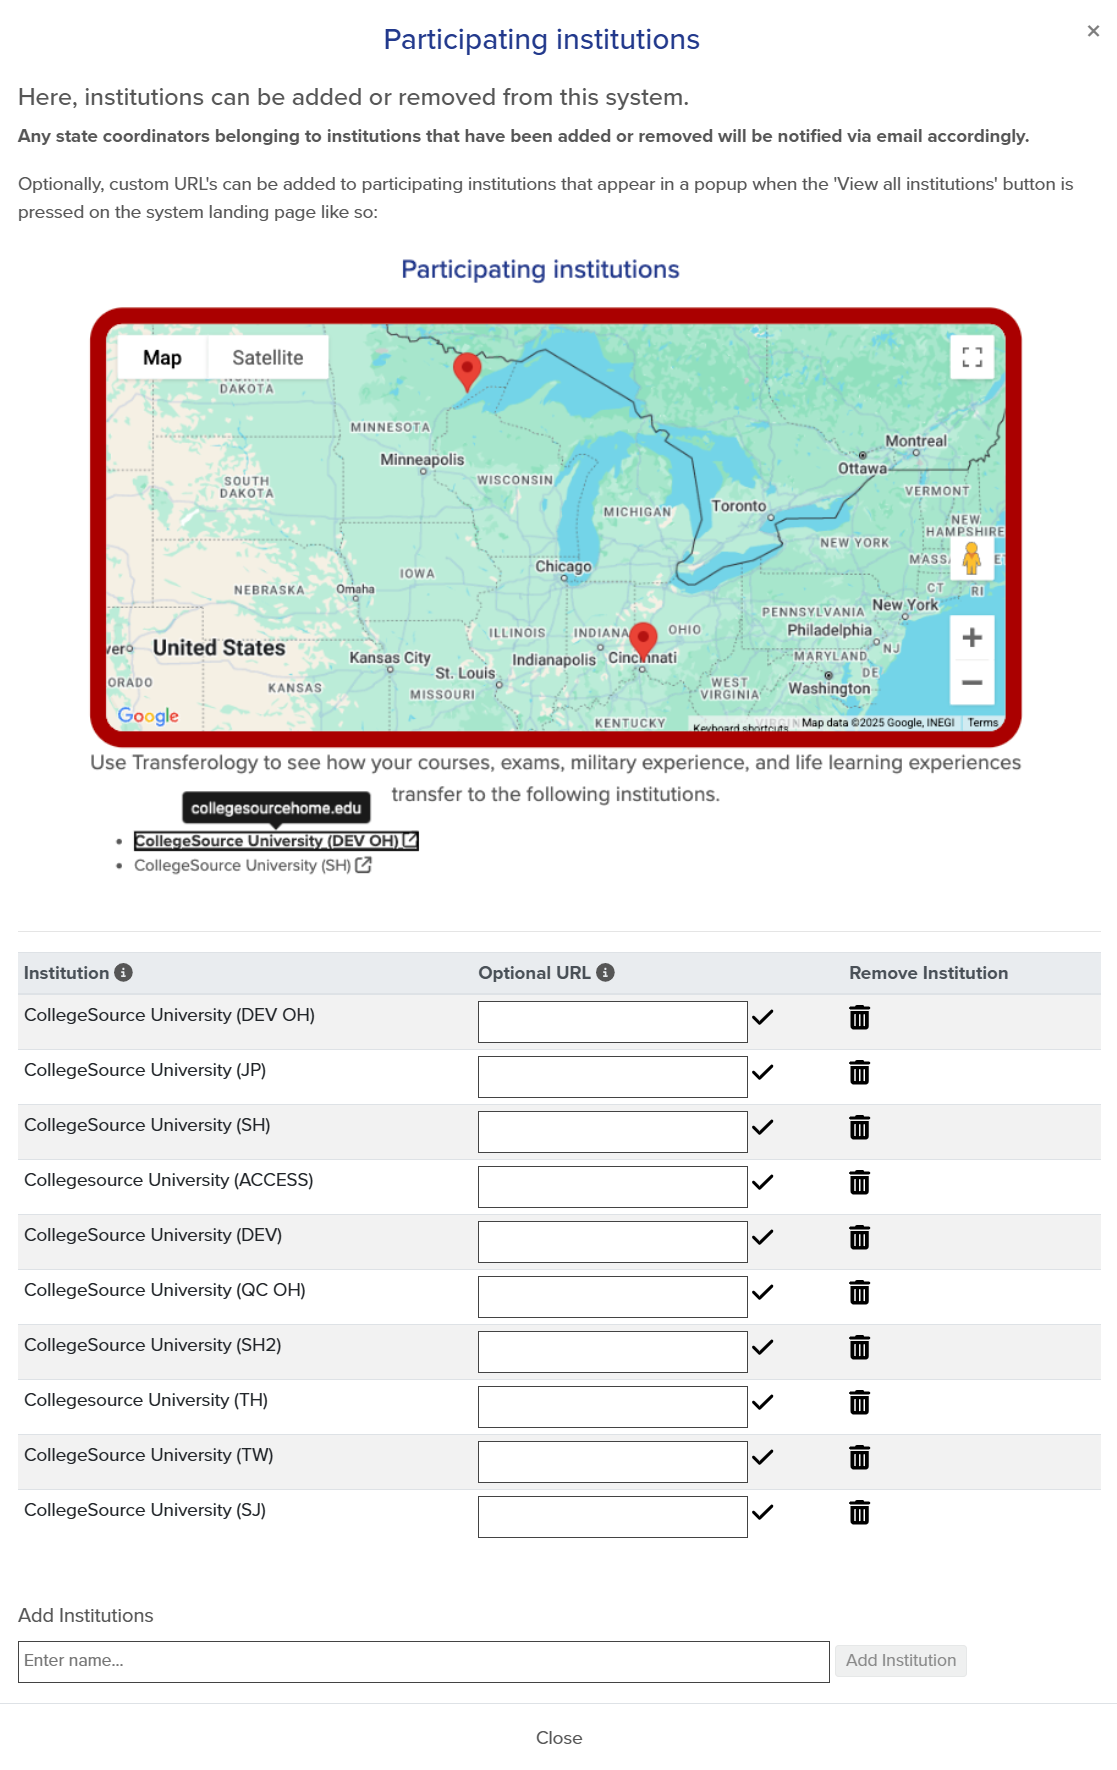
Add an Institution
To add a college or university as a participating institution:
- Go to the Add Institutions search box.
- Enter the name of the institution into the field.
- Institutions containing the entered text will begin prepopulating in the search box. Select the college or university from the list.
- Select the Add Institution button.
A notification will state that the institution has been successfully added. The college or university will appear at the bottom of the Institution list. Users with the State Coordinator role at the added institution will receive a notification email explaining the change.
Add, Remove, or Edit an Optional URL
To add, remove, or edit an institution's URL:
- Go to the Optional URL textbox.
Add a URL
- Enter the URL into the textbox.
- Select the Save URL checkmark.
A notification will state that the URL has been successfully saved.
Remove a URL
- Remove the URL from the textbox.
- Select the Save URL checkmark.
A notification will state that the URL has been successfully saved.
Edit a URL
- Adjust the text within the textbox.
- Select the Save URL checkmark.
A notification will state that the URL has been successfully saved.
Remove an Institution
To remove an institution from the participants list:
- Select the trashcan icon to the right of the institution name.
- A confirmation message will appear on the screen, noting that removing the institution from the participant list also removes the State Coordinator's access to edit the landing page.
- Select Yes to proceed.
A notification will appear stating that the institution was successfully removed from the state/system. Users with the State Coordinator role at the institution will receive a notification email explaining the change.